
How to Make Ad on a Banner in Minecraft
How to make a Letter D Banner in Minecraft
This Minecraft tutorial explains how to craft a Letter D banner with screenshots and footstep-by-step instructions.
In Minecraft, you can hands craft letter banners and brand your own banner that has a large Letter D (alphabet letter of the alphabet) on information technology. The banner can so be used equally a flag or to decorate a shield. To craft a Letter D Minecraft imprint, you volition need to use a loom rather than a crafting table.
Let's explore how to brand the Alphabetic character D banner in Minecraft.
Supported Platforms
The Letter D banner is available in the following versions of Minecraft:
| Platform | Supported (Version*) |
|---|---|
| | Yep (1.8) |
| | Yes (i.2) |
| | Yep (TU43) |
| | Yes (CU33) |
| | Aye (1.36) |
| | Yes (1.36) |
| | Yes (Patch 13) |
| | Yep |
| | Yep (1.2) |
| | Yes (1.0.21) |
* The version that information technology was added or removed, if applicable.
NOTE: Pocket Edition (PE), Xbox I, PS4, Nintendo Switch, and Windows x Edition are at present chosen Bedrock Edition. We volition continue to show them individually for version history.
Required Materials to make a Letter D Banner
In Minecraft, these are the materials you can apply to craft the Alphabetic character D imprint:
TIP: You tin can modify the color of the Letter of the alphabet D that appears on the banner. Just supervene upon the black dye with another dye when crafting the imprint in the loom. For example, use iv ruby dye instead of iv black dye to arts and crafts a ruddy Letter D banner.
How to arts and crafts a Letter D Banner
i. Open up the Loom Bill of fare
First, open up your Loom then that yous take a Loom card that looks like this:
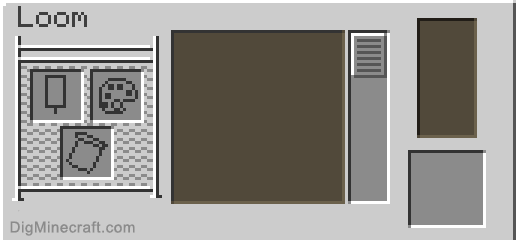
There are iii slots in the Loom menu so that you can add together a banner, a dye and an optional imprint pattern.
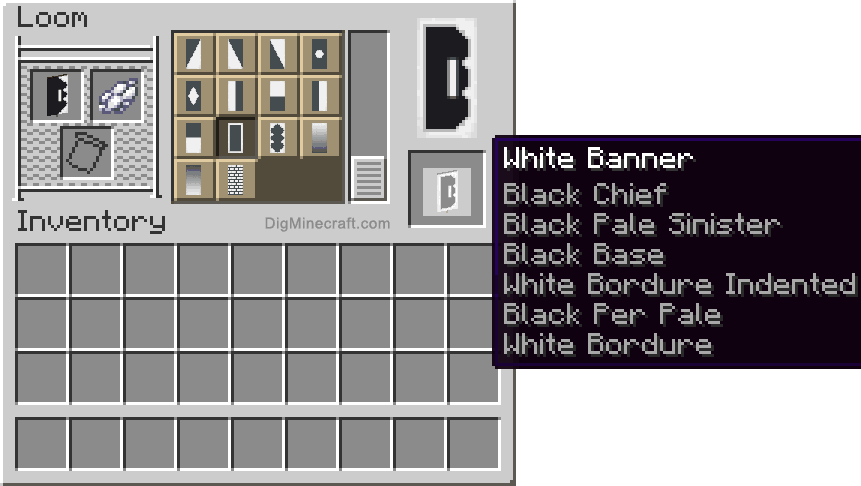
2. Complete the 1st Pattern of Blackness Chief
Complete the first blueprint by placing 1 white imprint and 1 black dye in the loom and and then selecting the Master option from the list of patterns available (utilize the scroll bar to meet all of the pattern options):

This will add together the Black Primary pattern to the white banner. Motion the completed banner to your inventory.
3. Complete the 2nd Design of Black Pale Sinister
Next, complete the second pattern by placing the banner from Step #2 and 1 black dye in the loom and and then selecting the Pale Sinister option from the list of patterns available:

This volition add together the Black Pale Sinister pattern to the banner. Move the completed banner to your inventory.
4. Complete the 3rd Pattern of Black Base
Next, consummate the third pattern by placing the imprint from Pace #3 and 1 blackness dye in the loom and so selecting the Base option from the list of patterns available:

This volition add together the Black Base of operations pattern to the banner. Movement the completed imprint to your inventory.
5. Consummate the quaternary Blueprint of White Bordure Indented
Next, complete the fourth pattern past placing the banner from Step #iv and one white dye in the loom and then selecting the Bordure Indented choice from the listing of patterns available:

This will add the White Bordure Indented pattern to the imprint. Motility the completed banner to your inventory.
6. Consummate the 5th Pattern of Blackness Per Pale
Next, complete the 5th design by placing the imprint from Stride #5 and one black dye in the loom and so selecting the Per Stake option from the list of patterns available:

This will add the Black Per Stake pattern to the banner. Move the completed banner to your inventory.
7. Complete the 6th Pattern of White Bordure
Next, complete the sixth pattern by placing the banner from Step #half dozen and 1 white dye in the loom and then selecting the Bordure option from the list of patterns bachelor:

This will add the White Bordure design to the imprint. If you hover over the banner, you volition run across the patterns that have been added the white banner.
To make the Letter D banner, 6 patterns have been added to the white banner: Black Chief, Blackness Pale Sinister, Blackness Base, White Bordure Indented, Blackness Per Pale and White Bordure.
8. Move the Letter of the alphabet D Banner to Inventory
At present that the Letter D banner is done, you need to move information technology to your inventory.

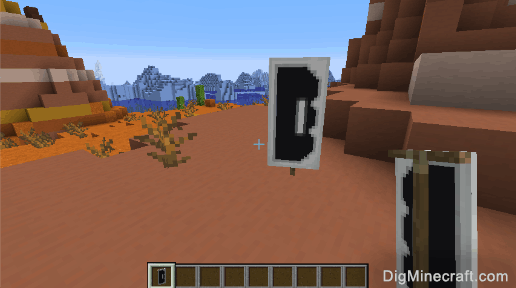
Congratulations, you accept made the Letter D banner in Minecraft!
Other Banners
Check out these other types of banners that you lot can brand in Minecraft:
DOWNLOAD HERE
How to Make Ad on a Banner in Minecraft TUTORIAL
Posted by: muellergionly.blogspot.com
Comments
Post a Comment